Method 1 of 3: Using the Device Manager

1 Open the Device Manager. You can access the Device Manager from the Control Panel. It will be located in the System and Security section if you are using Category View.
------------------------------------------------------------------------------------------------------------

2 Expand the Network Adapters section. In your Device Manager, you will see a list of all of the hardware installed on your computer. These are sorted into categories. Expand the Network Adapters section to see all of your installed network adapters.
If you are not sure which adapter you are using, see Step 1 at the beginning of this article to find your device's Description.
------------------------------------------------------------------------------------------------------------

Right-click on your adapter. Select Properties from the menu to open the network adapter's Properties window.
------------------------------------------------------------------------------------------------------------

Click the Advanced tab. Look for the "Network Address" or "Locally Administered Address" entry. Highlight it and you will see a "Value" field on the right. Click the radio button to enable the "Value" field.
Not all adapters can be changed this way. If you can't find either of these entries, you will need to use one of the other methods in this article.
------------------------------------------------------------------------------------------------------------

Enter your new MAC address. MAC addresses are 12-digit values, and should be entered without any dashes or colons. For example, if you want to make the MAC address "2A:1B:4C:3D:6E:5F", you would enter "2A1B4C3D6E5F"
------------------------------------------------------------------------------------------------------------

Reboot your computer to enable the changes. You can also disable and re-enable your adapter within Windows for the change to become effective without rebooting. Just sliding the Wi-Fi's On/Off switch like the slider found on ThinkPads and VaiOs won't satisfactorily disable/re-enable the card.
------------------------------------------------------------------------------------------------------------
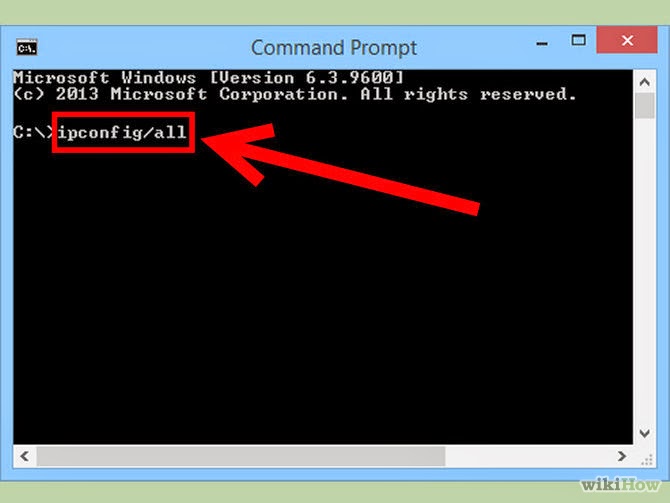
Check that the changes took effect. Once you've rebooted the computer, open the Command Prompt and enter ipconfig /all and note the Physical Address of your adapter. It should be your new MAC address.
------------------------------------------------------------------------------------------------------------
Method 2 of 3: Using Registry Editor
'''''''''''''''''''''''''''''''''''''''''''''''''''''''''''''''

1Find your network adapter's ID information. In order to easily identify your network adapter in the Windows Registry, you'll want to gather some basic information about it through the Command Prompt. You can open the Command Prompt by typing "cmd" into the Run box (Windows key + R).
Type ipconfig /all and press Enter. Note the Description and Physical Address for the active network device. Ignore devices that aren't active (Media Disconnected).
Type net config rdr and press Enter. Note the GUID, which is displayed between the "{}" brackets next to the Physical Address you recorded earlier.
------------------------------------------------------------------------------------------------------------

2 Open the Registry Editor. You can start the Registry Editor by opening the Run dialog box (Windows key + R) and typing "regedit". This will open the Registry Editor, which will allow you to change the settings for your network card.
Making incorrect changes to the registry can cause your system to malfunction.
------------------------------------------------------------------------------------------------------------

3 Navigate to the registry key. Go to HKEY_LOCAL_MACHINE\SYSTEM\CurrentControlSet\Control\Class\{4D36E972-E325-11CE-BFC1-08002BE10318}. Expand it by clicking the arrow.
------------------------------------------------------------------------------------------------------------

4 Find your adapter. There will be several folders labeled "0000", "0001", etc. Open each of these and compare the DriverDesc field to the Description you noted in the first step. To be completely sure, check the NetCfgInstanceID field and match it with the GUID from the first step.
------------------------------------------------------------------------------------------------------------

5 Right-click on the folder that matches your device. For example, if the "0001" folder matches your device, right-click on the folder. Select New → String Value. Name the new value "NetworkAddress".
------------------------------------------------------------------------------------------------------------

6 Double-click the new NetworkAddress entry. In the "Value data" field, enter your new MAC address. MAC addresses are 12-digit values, and should be entered without any dashes or colons. For example, if you want to make the MAC address "2A:1B:4C:3D:6E:5F", you would enter "2A1B4C3D6E5F".

7 Ensure that the MAC address is formatted properly. Some adapters (especially Wi-Fi cards) are unforgiving of MAC addresses changes if the first octet's 2nd half isn't a 2,6,A,E or begins with a zero. This requirement has been observed as far back as Windows XP and is formatted as:
D2XXXXXXXXXX
D6XXXXXXXXXX
DAXXXXXXXXXX
DEXXXXXXXXXX
------------------------------------------------------------------------------------------------------------

8 Reboot your computer to enable the changes. You can also disable and re-enable your adapter within Windows for the change to become effective without rebooting. Just sliding the Wi-Fi's On/Off switch like the slider found on ThinkPad's and VaiO's won't satisfactorily disable/re-enable the card.
------------------------------------------------------------------------------------------------------------

9 Check that the changes took effect. Once you've rebooted the computer, open the Command Prompt and enter ipconfig /all and note the Physical Address of your adapter. It should be your new MAC address.[1]
Method 3 of 3: Using SMAC
------------------------------------------------------------------------------------------------------------

1 Download the SMAC program. SMAC is a paid tool with a free demo that will allow you to quickly change your MAC address. It is compatible with Windows XP, Vista, and 7. Be sure to only download from trusted sources.
Install the software after downloading it. Most users will be fine with the default settings.
------------------------------------------------------------------------------------------------------------

2 Select your adapter. When you open SMAC, you will see a list of all of your installed network devices. Select the adapter that you want to change the address for.
------------------------------------------------------------------------------------------------------------

3 Enter your new address. In the fields under "New Spoofed MAC Address", enter in the new MAC address.
------------------------------------------------------------------------------------------------------------

4 Ensure that the MAC address is formatted properly. Some adapters (especially Wi-Fi cards) are unforgiving of MAC addresses changes if the first octet's 2nd half isn't a 2,6,A,E or begins with a zero. This requirement has been observed as far back as Windows XP and is formatted as:
D2XXXXXXXXXX
D6XXXXXXXXXX
DAXXXXXXXXXX
DEXXXXXXXXXX
------------------------------------------------------------------------------------------------------------

5 Click Options. Select the "Automatically Restart Adapter" option from the menu. It should have a check mark next to it.
------------------------------------------------------------------------------------------------------------

6 Click the "Update MAC" button. Your network connection will be temporarily disabled as your MAC address is updated. Verify that the address changed in the grid listing your devices.
<-----------------------------------------------------"-"------------------------------------------------>
This is dummy text. It is not meant to be read. Accordingly, it is difficult to figure out when to end it. But then, this is dummy text. It is not meant to be read. Period.
ConversionConversion EmoticonEmoticon